
Peace Connect: eTA application guidance

Guidance for Peace Connect attendees applying for their eTA.
sectional-banner-texture

**Please note that the information below is for 2025 Peace Connect attendees only.**

طلب تصريح السفر الإلكترونيeTA

The official eTA application portal is here. There are other websites and services available to complete an application, but please use this link for the official Kenyan government page. Others are sometimes a scam! 

What you will need to complete your application 

  • A colour image file of the photo page of your passport, to upload to the form 
  • A colour photo of your face, in the style of a passport photo – this can be a selfie. There is an option in the form to use your computer or phone’s camera to take a photo, but if this won’t work for you, find a photo beforehand to upload to the form. 
  • Your flight or other transport booking details (eg airline, flight number, date of arrival and departure) 
  • A hotel booking or other accommodation address (eg if staying with friends or family) 
  • A credit or debit card to complete payment 
  • Patience! The form will take a bit of time to complete, and the pages can be slow to load – sometimes you think it’s stuck but it’s loading… sometimes it IS stuck and you may need to refresh the page or even close the window and try again, but it should save your application for a few hours – if you go back to the home page, any applications in progress will show on the right-hand side.

Making your application: step-by-step

  1. On the official website, click on Apply Now, and select the green Tourists and Visitors button. If you are a citizen of an exempt country (most countries in Africa and the Caribbean) you do not need to apply for an eTA (click the yellow button to see a confirmation of this). 
  2. A page of information will come up – press Continue. A page titled ‘Declaration of Consent’ will then appear – read this, tick the box to agree and press Continue. You do not need to tick the second box to opt in for offers.
  3. The next page asks you to continue with an Individual Application or Group Application. We would recommend that each person travelling applies for an Individual Application.
  4. You are then asked for your Country of Residence – select the country you live and pay taxes in.
  5. On the next page you will need to upload a photo of your passport, and confirm that the details the form has scanned digitally are correct.
  6. The second image to upload on the next page is a selfie – you can upload your own photo or use your webcam or phone camera to do this. Make sure it is clear and follows the guidelines of a passport photo as it will be used to match to your passport. If you are not recognisable your application may be rejected.
  7. Next is contact information – Phone number, email address (make sure you enter this correctly as your application correspondence will be sent to this email), physical address in your country of residence, your occupation (if not listed, choose the most similar thing possible), and finally an emergency contact name and phone number.
  8. Reason for travel – this section is important!  
    1. Select Conference/Meetings/Seminars/Training. There is also an option for Business – don’t select this option! 
    2. On the same page you will be asked your date of arrival – enter the date you will enter Kenya, even if you are arriving early and spending time in Kenya before Peace Connect. You must then select the mode of Arrival transport. For most people this will be Arriving by Air, but there are also options for Arriving by Sea and Arriving by Land. Select whichever applies, and fill in the transport details:
      1. AirAirline name and Flight Number (you will find this on your flight booking and you must provide the correct information), Arrival Airport (in most cases Jomo Kenyatta International Airport (NBO) but Wilson is an additional, much smaller Nairobi airport), and Country of Origin (where you started your journey, regardless of any connections and transfers) 
      2. Sea – Name of vessel, port of entry in Kenya (if you arrive at a Tanzanian port and fly or drive from there, select Air or Land instead of Sea), and country of origin (where you started your journey, regardless of any connections and transfers) 
      3. Land – Name of border crossing (if travelling by bus, check with the bus operator or your travel agent. If driving your own vehicle, decide your route ahead of time), and country of origin (where you started your journey, regardless of any connections and transfers)
         
    3. Next, select the mode of Departure transport. Fill in all fields as above for arrivals, but be sure to check your travel booking in case of a different mode or port of transport. 
    4. Finally, Place of Stay. Write in the name of the first accommodation you will stay in and the dates you will be staying there. If you will be staying in Kenya in different accommodation before the dates of Peace Connect, enter this information first, and then click on Add another place of stay to add the detail for your accommodation during the event. Likewise if you are staying on elsewhere in Kenya after Peace Connect, add a new place of stay. 
    5. Warning – some parts of this page seem to clear if you go to the next page and then try to go back, and you will need to fill them in again!
  9. Next there are some questions about the traveller. 
    1. Is your trip being financed by someone other than your employer or the government? In some cases the answer to this will be yes – for example if you have received funding from a third party. You will need a letter from the person or organisation providing funding, as well as contact details for them. If you are financing the trip entirely yourself, select No. 
    2. Country and nationality at birth 
    3. Marital status 
    4. Have you been denied entry to Kenya before? Selecting yes can affect your entry this time, but you must be honest – they can check!
  10. The next page asks if you will be bringing currency over the value of 10,000USD into Kenya. This is unlikely to be the case for anyone, and it will be less complicated if you can avoid doing so.
  11. Now for uploading all your documents. You will need to upload a file of the following, as either a PDF, Word or image file: 
    1. Airline/Cruise Booking Confirmation – This doesn’t actually need to be the final ticket, so if for any reason you don’t have an official ticket yet, a confirmation email (or confirmation document from a travel agent) will do! 
    2. Accommodation Booking Confirmations – A confirmation email or document from all the accommodations you listed on the previous page. It will only accept one upload, so annoyingly you will have to consolidate different bookings into one file. If you are staying in private accommodation (eg with friends or family), you will need a signed letter from them stating the dates you will be staying with them, and that they will provide all meals for you (even if they won’t – it will make things easier!)
  12. You will next be asked to read a declaration and tick the box to confirm you understand and agree. There is also a box here to add a note, which could be to explain anything you are concerned may be queried by the eTA processing officer. 
  13. Finally, you must make the payment required to submit your eTA application. There are two price options – Standard for 30USD and Expedited for 130USD. Hopefully you are completing this application with plenty of time ahead and so Standard will suffice! Guidance is given here that the normal expected turnaround time for approval or refusal is 0-72 hours. Make your selection and press Continue to go to the payment page. 
    1. There are two options here – you can pay in Kenyan Shillings or USD. Make your selection and click the ‘Pay’ button. A card payment form will then appear, which you can fill in as you would any other online purchase.  
    2. At this point you will also be sent a payment link by email, so if you need to come back to it later you can quickly return to the payment page. Click ‘Next’ to complete the payment and watch the page to ensure it goes through, and in case of needing further card verification. 
    3. Once you have filled in the card details, click ‘Next’ to complete the payment and watch the page to ensure it goes through, and in case of needing further card verification.
  14. Your application is complete! You should receive an email confirmation, as well as a payment receipt. You will be able to return to the eTA application portal to check on the status of your application. 

Got more questions?

Contact us at [email protected]

Join us at Peace Connect this October

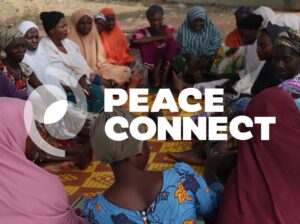
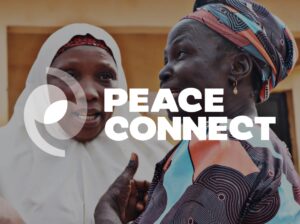
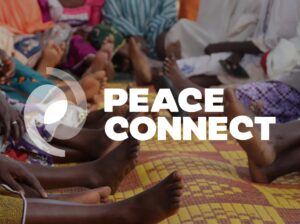
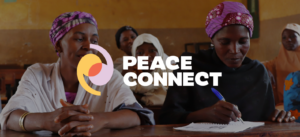
Peace Connect is a five-day gathering for local peacebuilders and their allies.

Attendees from Global South countries have priority, but funders and network members from the Global North are also welcome.

There will be interpretation and translation in French, Spanish and Arabic throughout the event.